
By Jonah Rafferty • April 2, 2026 • Updated June 08, 2026
I started cooking because I had to. I was nineteen, living in a studio apartment in Pawtucket, Rhode Island, with a hot plate, a mini-fridge, and a budget that made ramen look expensive. I could not afford to eat out. I could not afford frozen dinners. I had to learn to cook, and I had to learn fast.
My first meal was scrambled eggs that I burned because I cooked them on high heat. My second was pasta that I overcooked into mush. My third was a grilled cheese that was raw in the middle and burnt on the outside. I was not a natural. I was desperate.
But I kept cooking because I had no choice. And slowly, over months and years, I got better. Not because I studied technique or bought fancy equipment. Because I cooked almost every day, made almost every mistake, and learned what actually works in a real kitchen with real limitations.
If you are a beginner who wants to cook more, this is for you. Not the Pinterest version of cooking. Not the chef’s version. The version that works when you are tired, broke, and hungry, and you need to feed yourself in 30 minutes with ingredients you can afford.
The Mindset: Cooking Is a Skill, Not a Talent
The biggest lie about cooking is that some people are “naturally good at it.” I was terrible. I am still mediocre at many things. But I can feed myself and my family consistently because I treat cooking as a skill that improves with practice, not a talent that you either have or do not.
What this means practically:
- Your first attempts will be bad. That is normal. Keep cooking.
- You do not need expensive equipment. A $15 knife and a $20 pan are enough to start.
- You do not need exotic ingredients. Salt, pepper, oil, and acid (lemon or vinegar) are 90% of flavor.
- You do not need to follow recipes exactly. Recipes are guidelines, not contracts. Substitute based on what you have.
- You will make mistakes. You will burn things, under-season things, and occasionally create something inedible. This is how you learn. I still burn garlic sometimes. It happens.
The goal is not to become a chef. The goal is to feed yourself reliably, enjoyably, and affordably. Everything else is bonus.
The Equipment: Start With Four Things
When I started cooking, I had a hot plate, a pot, a pan, and a knife. That was it. I cooked for a year with just those four things. You do not need a fully equipped kitchen to start. You need a few reliable tools and the willingness to use them.
What I recommend for beginners:
- A chef’s knife ($20-40): An 8-inch chef’s knife is the only knife you need for 90% of cooking. You do not need a set of 12 knives. You need one good knife that stays sharp. Learn to hold it properly: pinch the blade between thumb and forefinger where it meets the handle, wrap remaining fingers around the handle. This gives control and prevents fatigue. A dull knife is dangerous. A sharp knife is safe. Learn to sharpen it or have it sharpened twice a year.
- A cutting board ($10-15): Plastic or wood. Large enough that your knife fits on it with room to move. I prefer plastic because it goes in the dishwasher. I have two: one for meat and one for vegetables. This prevents cross-contamination.
- A large skillet or sauté pan ($25-40): 12-inch, with a lid, oven-safe if possible. Stainless steel or cast iron. Non-stick is fine for beginners but does not brown food well and the coating degrades over time. I started with non-stick and graduated to stainless steel when I understood heat. Either works. The key is size: a large pan prevents overcrowding, which is the most common beginner mistake.
- A medium pot with lid ($20-30): 3-4 quart, for boiling pasta, making soup, cooking rice, and steaming vegetables. Stainless steel or enamel-coated. A heavy bottom prevents scorching.
What you do not need yet:
- A slow cooker, Instant Pot, air fryer, or any other single-purpose appliance. These are useful eventually, but they are not necessary to start. Learn basic stovetop cooking first. The skills transfer to every appliance.
- A full set of pots and pans. Two vessels are enough for 90% of beginner cooking.
- Fancy gadgets: garlic press, avocado slicer, egg separator, apple corer. A knife does all of these things. Learn to use it.
- Expensive cookware. A $20 pan from a restaurant supply store outperforms a $200 pan from a boutique kitchen store. Heavy bottom, comfortable handle, oven-safe. That is all that matters.
The Techniques: Five Skills That Cover Everything
I spent eight years in restaurant kitchens, and I can tell you that professional cooking is built on a small set of fundamental techniques. Everything else is variation. If you master these five, you can cook almost anything.
1. Sautéing (cooking in oil over medium-high heat)
Sautéing is the foundation of flavor. When food hits hot oil, it browns. Browning creates hundreds of flavor compounds through the Maillard reaction. This is why restaurant food tastes better than boiled food. It is not magic. It is browning.
How to sauté properly:
- Heat the pan over medium-high heat for 2-3 minutes. The pan should be hot before you add oil.
- Add oil. It should shimmer but not smoke. If it smokes, it is too hot. Turn it down.
- Add food in a single layer. Do not overcrowd. Overcrowding lowers the temperature and steams the food instead of browning it.
- Let it sit. Do not stir constantly. Food needs contact with the hot pan to brown. Stirring too often prevents browning.
- Flip or stir when the food releases easily from the pan. If it is sticking, it is not ready to move. Wait for the brown crust to form.
- Season with salt and pepper while cooking. Salt draws out moisture and helps browning. Pepper adds flavor.
What to practice: Sauté onions until golden. Sauté chicken pieces until browned. Sauté vegetables until tender and slightly caramelized. This one technique is the basis of stir-fries, pan sauces, and most skillet meals.
2. Boiling (cooking in water at 212°F)
Boiling seems simple, but beginners make two mistakes: they do not use enough water, and they do not salt the water. Both ruin the result.
How to boil properly:
- Use a large pot with plenty of water. Food needs room to move. Crowded food lowers the water temperature and cooks unevenly.
- Bring water to a full boil before adding food. Adding food to cold water changes the cooking time and texture unpredictably.
- Salt the water generously. For pasta, the water should taste like the sea. This is your only chance to season the pasta from the inside. Under-salted water makes bland pasta no matter what sauce you use.
- Stir occasionally to prevent sticking.
- Test for doneness before draining. Pasta should be al dente: firm to the bite, not mushy. Vegetables should be tender but not falling apart.
- Save some pasta water before draining. The starchy water is liquid gold for sauces. It emulsifies oil and creates a glossy coating.
What to practice: Boil pasta until al dente. Boil potatoes until tender. Boil eggs (start in cold water, bring to boil, turn off heat, cover 10-12 minutes for hard-boiled). Boil rice (1 cup rice to 1.5 cups water, bring to boil, reduce to low, cover 15 minutes, rest 5 minutes).
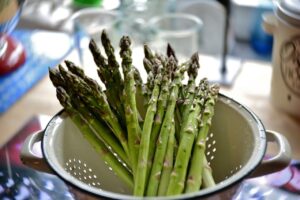
3. Roasting (cooking in dry heat in the oven)
Roasting is the easiest way to make vegetables and meat taste good with minimal effort. The dry heat of the oven caramelizes sugars, browns surfaces, and concentrates flavors. It is harder to burn things in the oven than on the stovetop because the heat is indirect and consistent.
How to roast properly:
- Preheat the oven. Most roasting happens at 400-425°F. Preheating ensures the food starts cooking immediately instead of slowly warming up.
- Cut food into uniform pieces. If pieces are different sizes, small ones burn before large ones are cooked.
- Toss with oil, salt, and pepper. Oil conducts heat and prevents sticking. Salt and pepper are the minimum seasoning. Add garlic powder, paprika, or dried herbs if you want.
- Spread in a single layer on a sheet pan. Do not overcrowd. Overcrowding steams instead of roasts. Use two pans if necessary.
- Roast until browned and tender. Vegetables: 20-30 minutes. Chicken thighs: 35-40 minutes. Whole chicken: 1-1.5 hours. Fish: 12-15 minutes.
- Let meat rest 5-10 minutes after roasting. This allows juices to redistribute. Cutting immediately causes juices to run out, leaving dry meat.
What to practice: Roast broccoli with olive oil and salt at 425°F for 25 minutes. Roast chicken thighs with paprika and garlic at 425°F for 35 minutes. Roast potatoes with rosemary and olive oil at 400°F for 45 minutes. These three dishes alone will transform your weeknight dinners.
4. Simmering (cooking in liquid just below boiling)
Simmering is gentle boiling. Bubbles rise slowly and break the surface gently. This is the temperature for soups, stews, sauces, and braises. Boiling is too aggressive for these dishes. It toughens meat, breaks vegetables apart, and evaporates liquid too quickly.
How to simmer properly:
- Bring liquid to a boil first. This is faster than heating to a simmer.
- Reduce heat to low or medium-low. You want small bubbles, not a rolling boil.
- Cover partially if you want to reduce liquid (concentrate flavors). Cover fully if you want to retain liquid.
- Stir occasionally. Food can stick to the bottom during long simmers.
- Check liquid level periodically. Add more if it evaporates too much. The food should be mostly submerged.
What to practice: Simmer canned tomatoes with garlic and olive oil for 20 minutes to make a simple pasta sauce. Simmer dried lentils with onions and carrots for 30 minutes to make soup. Simmer chicken thighs in broth with vegetables for 45 minutes to make stew. These are forgiving dishes that teach you how liquid, heat, and time interact.
5. Seasoning (adding salt, acid, and flavor)
This is not a cooking technique, but it is the most important skill. Under-seasoned food is bland regardless of technique. Properly seasoned food tastes good even with simple cooking.
The three pillars of seasoning:
- Salt: Enhances natural flavors. Food without salt tastes flat and lifeless. I season at every step: salt the meat before cooking, salt the vegetables as they sauté, salt the pasta water, salt the sauce, taste at the end and adjust. I use kosher salt for cooking because the larger crystals are easier to pinch and distribute. I use flaky sea salt for finishing because it adds texture and bursts of flavor.
- Acid: Brightens and balances. Lemon juice, vinegar, and tomatoes add acidity that cuts through richness and makes flavors pop. I add acid at the end of cooking because heat destroys the bright, fresh quality of acid. A squeeze of lemon on roasted chicken, a splash of vinegar on beans, a dollop of yogurt on soup. Acid transforms good food into great food.
- Fat: Carries flavor and creates richness. Olive oil, butter, and animal fats coat the tongue and make food satisfying. I use fat generously but not excessively. A drizzle of olive oil on vegetables before roasting. A pat of butter in a pan sauce. A splash of cream in a soup. Fat is not the enemy. It is the delivery system for flavor.
What to practice: Taste your food at every stage. Before adding salt, after adding salt, after adding acid. Notice the difference. This is how you develop your palate. There is no substitute for tasting.
The Recipes: Five Meals Every Beginner Should Master
These are not fancy recipes. They are foundational meals that teach multiple techniques and can be adapted endlessly. Master these five, and you can feed yourself for life.
1. Scrambled Eggs
Techniques: Heat control, stirring, seasoning. Time: 5 minutes.
Ingredients: 2-3 eggs, 1 tablespoon butter, salt, pepper, optional: cheese, herbs, hot sauce.
Method:
- Crack eggs into a bowl. Whisk with a fork until yolks and whites are combined. Add a pinch of salt.
- Heat a non-stick pan over medium-low heat. Add butter. Let it melt and foam.
- Pour in eggs. Let them sit for 10 seconds until they start to set on the bottom.
- Using a silicone spatula, gently push the eggs from the edges toward the center, forming soft curds.
- Continue pushing and folding until the eggs are mostly set but still slightly wet. They will continue cooking from residual heat.
- Remove from heat immediately. Add cheese if using. Season with pepper. Serve.
Why this matters: Scrambled eggs teach heat control. Too hot, and they become rubbery. Too cold, and they take forever and weep liquid. The goal is creamy, soft curds. This is the same heat control needed for omelets, pancakes, and pan sauces.
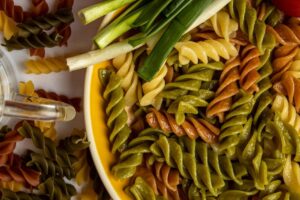
2. Pasta With Garlic and Oil
Techniques: Boiling, sautéing, emulsifying. Time: 20 minutes.
Ingredients: 8 oz pasta, 4 cloves garlic, 1/3 cup olive oil, red pepper flakes, salt, pepper, parsley or basil, Parmesan.
Method:
- Bring a large pot of salted water to a boil. Add pasta. Cook until al dente. Save 1 cup of pasta water before draining.
- While pasta cooks, thinly slice garlic.
- Heat olive oil in a large skillet over medium heat. Add garlic and red pepper flakes. Cook 1-2 minutes until garlic is golden but not brown. Brown garlic is bitter.
- Add drained pasta to the skillet. Toss to coat with oil.
- Add pasta water a little at a time, tossing constantly. The starch in the water emulsifies with the oil, creating a glossy sauce that clings to the pasta.
- Season with salt and pepper. Add herbs. Serve with Parmesan.
Why this matters: This dish teaches pasta cooking, garlic sautéing, and the magic of pasta water. The emulsification technique is the basis of every Italian pasta sauce. Once you understand this, you can make carbonara, cacio e pepe, and aglio e olio with the same technique.
3. Roasted Chicken Thighs With Vegetables
Techniques: Roasting, seasoning, resting. Time: 45 minutes.
Ingredients: 4 chicken thighs, 1 pound potatoes, 2 carrots, 1 onion, olive oil, salt, pepper, paprika, garlic powder.
Method:
- Preheat oven to 425°F.
- Cut potatoes and carrots into 1-inch pieces. Cut onion into wedges. Place on a sheet pan.
- Drizzle vegetables with olive oil. Season with salt, pepper, and half the paprika. Toss to coat. Spread in a single layer.
- Pat chicken thighs dry with paper towels. This is crucial for crispy skin. Moisture prevents browning.
- Season chicken with salt, pepper, remaining paprika, and garlic powder.
- Nestle chicken thighs among the vegetables, skin side up.
- Roast 35-40 minutes until chicken skin is crispy and internal temperature reaches 165°F. Vegetables should be tender and browned.
- Remove from oven. Let rest 5 minutes. Serve.
Why this matters: This is a complete dinner in one pan. It teaches roasting, seasoning meat, and the importance of resting. It is forgiving — chicken thighs are hard to overcook. It is adaptable — swap potatoes for sweet potatoes, carrots for broccoli, paprika for curry powder.
4. Simple Lentil Soup
Techniques: Sautéing, simmering, seasoning. Time: 40 minutes.
Ingredients: 1 cup dried red lentils, 1 onion, 2 carrots, 2 celery stalks, 4 cloves garlic, 4 cups broth, 1 can diced tomatoes, olive oil, cumin, salt, pepper, lemon.
Method:
- Dice onion, carrots, and celery. Mince garlic.
- Heat olive oil in a pot over medium heat. Add onion, carrots, and celery. Cook 5 minutes until softened.
- Add garlic and cumin. Cook 1 minute until fragrant.
- Add lentils, broth, and diced tomatoes (with juice). Stir.
- Bring to a boil, then reduce to low. Simmer 20-25 minutes until lentils are soft and starting to break down.
- Taste and adjust salt. The broth and tomatoes have salt, so wait until the end.
- Remove from heat. Stir in lemon juice. Serve with bread.
Why this matters: Soup is the most forgiving dish. It teaches sautéing aromatics, simmering, and building flavor in layers. Red lentils cook quickly and do not require soaking. This soup is vegetarian, cheap, and filling. It is the foundation of every soup you will ever make.
5. Fried Rice
Techniques: Sautéing, heat control, seasoning. Time: 15 minutes.
Ingredients: 2 cups cooked cold rice (day-old is best), 2 eggs, 1 cup frozen vegetables, 2 tablespoons soy sauce, 1 tablespoon oil, 1 clove garlic, green onions.
Method:
- Heat oil in a large skillet or wok over medium-high heat.
- Scramble eggs in the hot pan. Remove and set aside.
- Add more oil if needed. Add garlic and frozen vegetables. Cook 2-3 minutes until hot.
- Add cold rice. Break up clumps with a spatula. Stir-fry 3-4 minutes until rice is hot and slightly crispy.
- Add soy sauce. Toss to coat evenly.
- Add eggs back in. Break them up and mix through the rice.
- Top with sliced green onions. Serve.
Why this matters: Fried rice teaches high-heat cooking, timing, and the importance of cold rice. Fresh rice is too wet and clumps. Cold, day-old rice is dry and separates. This is the basis of every stir-fry. Once you can make fried rice, you can make any stir-fry with any protein and any vegetables.
Common Beginner Mistakes (And How to Fix Them)
I made all of these mistakes. Multiple times. Here is what I learned:
1. Cooking on too high heat
Everything burns on high heat. Garlic burns in 30 seconds. Butter burns in 1 minute. Chicken burns on the outside while raw inside. Start on medium heat. You can always increase. You cannot un-burn.
Fix: Use medium heat as your default. Only increase to medium-high or high for specific tasks like boiling water or searing meat. And even then, watch it constantly.
2. Overcrowding the pan
When food is crowded, it steams instead of browns. Steamed food is soft and pale. Browned food is crispy and flavorful. If your pan is full, cook in batches. It takes longer but tastes better.
Fix: Use a larger pan, or cook in two batches. Food should have space between pieces. If you cannot see the bottom of the pan between pieces, it is too crowded.
3. Not seasoning enough
Under-seasoned food is the most common beginner problem. Salt is not optional. It is essential. Food without salt tastes flat and boring. Season at every step, taste at the end, and adjust.
Fix: Season as you cook, not just at the end. Salt the meat before cooking. Salt the vegetables as they sauté. Salt the pasta water. Taste before serving and add more if needed. It is easier to add salt than to remove it.
4. Moving food too much
Beginners stir constantly. This prevents browning. Food needs contact with the hot pan to develop flavor. Let it sit. Let it brown. Then flip or stir.
Fix: Put food in the pan and walk away for 2 minutes. Seriously. Set a timer. When it releases easily from the pan, it is ready to flip. If it sticks, it is not ready. Wait.
5. Not reading the recipe before starting
I have started recipes only to discover halfway through that I need to marinate something for 2 hours or chill dough overnight. This is frustrating and wastes ingredients.
Fix: Read the entire recipe before you start. Check that you have all ingredients. Note any steps that require advance preparation. Then begin.
6. Using the wrong size pan or pot
A small pot for a large amount of pasta means the water cools too much when you add the pasta, resulting in gummy noodles. A small pan for a large amount of food means overcrowding and steaming.
Fix: Use a pot that holds at least 4 quarts for 1 pound of pasta. Use a 12-inch pan for cooking more than 2 servings. When in doubt, go bigger.
7. Not tasting as you cook
You cannot season properly if you do not taste. Tasting is not just for the end. Taste at every stage. Notice how flavors develop. This is how you learn.
Fix: Keep a clean spoon nearby. Taste before adding seasoning, after adding seasoning, and before serving. Adjust as needed. This is not being picky. This is being a cook.
Building Confidence: The 30-Day Challenge
If you are serious about learning to cook, I recommend a simple 30-day challenge. Not a complicated program. Just a commitment to cook at home most days for one month.
The challenge:
- Cook dinner at home at least 5 nights per week for 30 days.
- Make at least one of the five foundational recipes above each week.
- Try one new recipe or technique each week.
- Keep a simple journal: what you made, what worked, what did not, what you would do differently.
- Do not aim for perfection. Aim for completion. A mediocre homemade meal is better than a mediocre takeout meal, and it teaches you something.
After 30 days, you will have cooked 20+ meals. You will have made mistakes and learned from them. You will have developed a sense of what works in your kitchen with your equipment. You will be a better cook than you were a month ago, not because you studied, but because you practiced.
That is how I learned. Not from books or videos. From cooking almost every day for years, making almost every mistake, and slowly figuring out what works. You can do the same. Start with scrambled eggs. Master pasta with garlic and oil. Roast a chicken. Make lentil soup. Fry some rice. The rest is just variation.
By Jonah Rafferty • April 2, 2026 • Updated June 08, 2026